


 English
 中文简体
中文简体
 عربى
عربى

Content
- 1 What's a Door Seal Strip, and Do You Actually Need One?
- 2 Types of Door Seal Strips – Which One Goes Where?
- 3 Material Showdown – Rubber, Silicone, EPDM, or PVC?
- 4 How to Measure Your Gap – One Wrong Number and It Won't Seal
- 5 Installing a Door Seal Strip – DIY or Call a Pro?
- 6 Common Installation Mistakes That Ruin a Good Seal
- 7 When to Replace Your Door Seal Strip – Signs It's Done
- 8 Quick Fixes for Temporary Emergencies
- 9 Final Checklist – Before You Buy Your Door Seal Strip
What's a Door Seal Strip, and Do You Actually Need One?
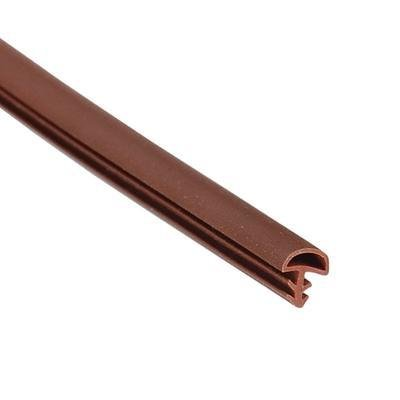
You know that sliver of light creeping under your front door? Or that draft that hits your ankles every time the wind blows? That's the gap your door seal strip is supposed to fill. A door seal strip is basically a length of flexible material – rubber, silicone, brush, or foam – attached to the edges of a door (usually the bottom or the sides) to block air, dust, water, noise, and insects from passing through. And yes, almost every exterior door needs one. Even interior doors benefit – especially if you want to soundproof a home office or keep kitchen smells contained. The catch is, there are dozens of types, and picking the wrong one for your door is as useless as no seal at all. Let's sort it out.
Types of Door Seal Strips – Which One Goes Where?
Walk down the weatherproofing aisle, and you'll see a bewildering shelf of seals. They all look vaguely similar, but each type has a specific job. Here's a plain‑English breakdown.
Bottom Seals – The Under‑Door Workhorses
These attach to the bottom edge of the door and sweep across the threshold. Three main varieties:
- Vinyl bulb seal – A hollow rubber tube that compresses against the floor when the door closes. Great for smooth, even thresholds. Cheap and effective, but wears out in 2‑3 years.
- Brush (sweep) seal – Dense nylon bristles that brush the floor. Ideal for uneven or textured surfaces like tile or outdoor concrete. They don't seal 100% airtight but handle slight floor height variations beautifully.
- Drop‑down seal – A clever mechanism that drops a rubber flap when the door closes and lifts it when you open. Pricey but gives the tightest seal – common in commercial buildings and soundproof doors.
Side and Top Seals – Stop the Drafts Around the Frame
The gaps between the door and the frame (left, right, and top) need sealing too. The most common options:
- Self‑adhesive foam tape – Cheap, easy to stick on, but low‑density foam compresses quickly and peels off in a year. Fine for a rental or temporary fix.
- Rubber or silicone fin seals – Thin, flexible fins that press against the door edge when closed. More durable than foam, and they slide smoothly without catching.
- Magnetic seals – Think refrigerator door – a magnet on the door pulls against a metal strip on the frame. Give the tightest seal and are used on premium exterior doors. Expensive and needs precise alignment.
- Interlocking metal seals – Two metal strips with rubber inserts that interlock when the door closes. Very durable, but they require routing a groove into the door or frame – not a DIY job.
Quick cheat sheet: foam tape for quick fixes, rubber fins for standard doors, brush sweeps for uneven floors, and drop‑down or magnetic seals if you want the absolute best performance and have a budget to match.
Material Showdown – Rubber, Silicone, EPDM, or PVC?
The material of your door seal strip determines how long it lasts, how flexible it stays in winter, and whether it'll crack after a year of UV exposure. Here's what you're actually choosing between.
| Material | Flexibility | UV/Sun Resistance | Temperature Range | Lifespan |
| EPDM (synthetic rubber) | Excellent | Good | -40°C to 120°C | 10‑15 years |
| Silicone | Superb | Excellent | -60°C to 200°C | 15‑20 years |
| PVC (vinyl) | Moderate | Poor – yellows and cracks | 0°C to 60°C | 3‑5 years |
| EPDM sponge foam | Good (compresses well) | Moderate | -30°C to 80°C | 5‑8 years |
If your door gets direct sunlight (south‑facing or glass doors), avoid PVC – it'll go brittle and crumble in two summers. EPDM is the industry standard for exterior doors – it's tough, stays flexible, and doesn't cost a fortune. Silicone is even better but overkill for most homes unless you live in a place with extreme cold or heat.
How to Measure Your Gap – One Wrong Number and It Won't Seal
The single biggest mistake people make is guessing the gap size. You can buy the fanciest door seal strip on the market, but if it's 2mm too thick or too thin, it either won't let the door close or will leave a gap big enough for a mouse to squeeze through. Here's the right way to measure.
For the bottom gap
Close the door. Take a set of feeler gauges or a stack of coins – slip them under the door until you find the thickest one that fits snugly. That's your gap height. Alternatively, use a ruler to measure from the bottom of the door down to the finished floor. Do this at three points (left, center, right) and use the largest measurement – floors are rarely perfectly flat. For a standard gap, anything under 6mm can use a door shoe or sweep; above 10mm, you'll likely need a drop‑down seal or a threshold filler.
For the side and top gaps
With the door closed, slip a feeler gauge or piece of paper between the door edge and the frame. If a single sheet of paper slides through easily, your gap is over 0.1mm – you need sealing. For a reliable measurement, use a metal ruler or caliper. The standard sealing fin works for gaps up to 4mm. If your gap is wider, you'll need a thicker bulb seal or a double‑fin design. And don't forget the door stop (the ridge in the frame) – many people measure the gap to the stop instead of the actual door edge, and buy a seal that's too shallow.
Installing a Door Seal Strip – DIY or Call a Pro?
Most door seal strips are absolutely DIY‑able – it's a 15‑minute job with a tape measure and scissors. But there are a few gotchas that turn an easy job into a frustrating one. Here's the step‑by‑step for each type.
Peel‑and‑stick foam or rubber fin seals (for sides and top)
Clean the door frame with rubbing alcohol or degreaser – any dust or oil will kill the adhesive. Measure the length of each side (left, right, top) and cut the strip about 5mm longer than needed. Peel the backing off a few inches at a time, press firmly, and work your way along. The trick: don't stretch the strip while applying – it'll contract later and leave gaps. Once it's on, close the door to check compression – you should feel some resistance but not have to slam the door. If the door bounces back, the seal is too thick – switch to a thinner profile.
Bottom sweep or brush seal (screw‑on type)
These are attached with screws through the door's bottom edge. First, hold the sweep against the closed door and mark where the screw holes will go. Pre‑drill pilot holes – wood doors split if you don't. Then align the sweep so the brush or rubber just touches the floor (don't drag it – you want 1‑2mm clearance so it sweeps without wearing out). Screw it in, test the door swing, and adjust if it scrapes. For hollow‑core doors, use the special expanding anchors that come with the kit – normal screws won't hold.
Drop‑down or automatic seals
These require routing a slot into the door bottom – unless you have a router and some experience, this one's best left to a carpenter. The alignment has to be millimeter‑perfect or the seal won't drop or lift properly.
Common Installation Mistakes That Ruin a Good Seal
Even with the right door seal strip, a sloppy install turns it into decoration. Here's what people mess up most often.
- Putting seal on the wrong surface – Side seals attach to the frame, not the door. Some people stick them to the door edge itself – then the seal moves with the door and doesn't press against anything. Read the instructions – frame for sides, door bottom for sweeps.
- Not cutting corners properly – When you reach the top corner, don't just bend the strip around – it creates a gap at the corner. Instead, cut a 45° miter joint or use a corner connector piece (many kits include them).
- Ignoring the threshold – If your threshold is worn or cracked, even the best bottom seal won't work. Fill or replace the threshold first, then install the seal.
- Over‑compressing – A seal that's squashed flat has no bounce left – it'll take a permanent set and stop sealing within weeks. The seal should compress by 25‑50% of its original thickness, not 100%.
- Forgetting the hinge gap – The gap behind the hinge side is often the largest leak. Install a thin fin seal on that side too, but make sure it's thin enough to clear the hinge knuckles.
When to Replace Your Door Seal Strip – Signs It's Done
Door seal strips don't last forever. Here are the tell‑tale signs yours is retired and needs replacing.
- Daylight test – Close the door on a sunny day. If you see light around the edges, the seal has shrunk or flattened.
- Drafts – Hold your hand near the door seam on a windy day. Feel a cold draft? The seal's not doing its job.
- Visible cracks or tears – Rubber and foam degrade. If you see splits, chunks missing, or the adhesive is peeling away, it's time.
- The door closes too easily – You used to feel a little resistance when latching the door. Now it swings shut with no friction. That means your seal has lost its profile.
- Dust or insect trails – If you're sweeping dirt from under the door or finding ants marching in, the gap is wide open.
If any of these ring true, don't just patch it – replace the whole run. A 2‑meter seal strip costs under $20; the energy and comfort you lose in a year from a bad seal can be ten times that.
Quick Fixes for Temporary Emergencies
Sometimes you need a seal now and the hardware store is closed. Here are a few stopgaps that actually work – temporarily.
- Draft snake (door sausage) – A fabric tube filled with rice, beans, or sand placed at the bottom of the door. Not elegant, but it blocks drafts instantly. Good for a week or two.
- Weatherproofing tape – If a seal has come loose, you can temporarily tape it back with strong double‑sided tape until you get a proper replacement. But don't rely on this for more than a month – the tape degrades.
- Cardboard shims – For doors that rattle in the frame, wedge a folded piece of cardboard between the door and the strike plate. It's ugly but stops the rattle and blocks the air gap until you fit a proper seal.
These are last‑resort fixes. If you can, replace the door seal strip properly – it's cheap, easy, and you'll wonder why you waited.
Final Checklist – Before You Buy Your Door Seal Strip
Take this list with you to the store (or have it open on your phone). It'll save you from a return trip.
- Measure the bottom gap – use feeler gauges or a ruler, and record the largest gap.
- Measure the side and top gaps – are they uniform or wider in places?
- Choose the material – EPDM for exterior, silicone for extreme temps, foam for interior.
- Pick the type – brush sweep for uneven floors, bulb seal for smooth thresholds, fin seal for side gaps.
- Check the total length – measure all four sides and add 15% for cutting waste.
- Confirm the attachment method – peel‑and‑stick, screw‑on, or routed. Does your door type support it?
- Check the door swing – does a bottom seal require a clearance groove, or does it attach to the face?
A properly selected and installed door seal strip is one of the cheapest energy‑saving upgrades you'll ever make. It pays for itself in heating and cooling bills within months, and it makes your home quieter, cleaner, and more comfortable year‑round. Take the time to get the right one – your toes (and your wallet) will thank you.


