


 English
 中文简体
中文简体
 عربى
عربى

A small gap around an interior door may not seem like a big problem, but it is the root cause of most common door complaints. You can hear the hallway noise at night, feel a cold draft near the floor, or wipe dust from a freshly cleaned room. A door seal strip fixes these issues in one step, and it costs very little. The conclusion up front: if the gap between your door and frame is 1-5mm, a properly sized seal strip will reduce noise leakage, stop drafts, keep out dust and insects, and protect the door edge from rattling.
Content
What a Door Seal Strip Actually Does
A door seal strip is not just weatherproofing. It is a functional component that closes the air gap between the moving door leaf and the fixed frame. When a door closes without a seal, that gap becomes a path for sound, air, dust, moisture and small insects. In a WPC door installation, the same principle applies: the door panel itself may be solid and stable, but performance is only as good as the sealing around it.
There are four clear outcomes you can expect from a correctly fitted seal:
- Sound reduction of roughly 3-8 dB in typical interior conditions, because the continuous contact prevents airborne noise from passing through the gap.
- Reduced drafts and heat loss, which cuts energy costs when the door separates a heated room from a colder corridor.
- No dust accumulation along the bottom edge or around the frame, which means less cleaning and less wear on door surfaces.
- Protection against the door moving when the room pressure changes, such as in air-conditioned or ventilated spaces.
Comparing Seal Strip Materials
Material choice determines how long the strip lasts and how well it performs in a given environment. Silicone, EPDM rubber, PVC and TPE have different tolerances for temperature, UV light and repeated compression.
| Material | Typical Working Range | Compression Recovery | Best Use |
|---|---|---|---|
| EPDM rubber | -40°C to 120°C | Excellent | Exterior doors, high UV exposure |
| Silicone | -50°C to 200°C | Very good | Bathroom and kitchen doors, high humidity |
| PVC | -10°C to 60°C | Good | Interior doors, lightweight in use |
| TPE | -30°C to 80°C | Very good | Interior doors, low cost, recyclable |
How to Choose the Right Door Seal Strip
Do not buy a seal strip because the packaging looks universal. The correct choice depends on three measurements and one environment check.
Measure the gap
Close the door and check the clearance between the door edge and the frame with a feeler gauge or a folded piece of paper. Use 5mm as a rough threshold: strips designed for a 1-3mm gap hold tight and look cleaner, while a wider gap may need a thicker profile. If you are unsure, pick a strip with an adhesive width slightly larger than the measured gap and keep the compression depth moderate.
Check the adhesion surface
Self-adhesive strips work best on clean, flat, non-porous surfaces such as WPC door frames, painted timber or aluminum. If the surface is rough or dusty, adhesion drops sharply within weeks. A screw-fixed brush seal or a nailed profile is more reliable for a door that opens frequently.
Match the environment
A bathroom door needs a silicone or TPE strip that tolerates moisture and repeated washing. An entrance door that faces direct sunlight needs EPDM or a UV-resistant silicone profile. An interior bedroom door can safely use a lightweight PVC strip without sacrificing performance.
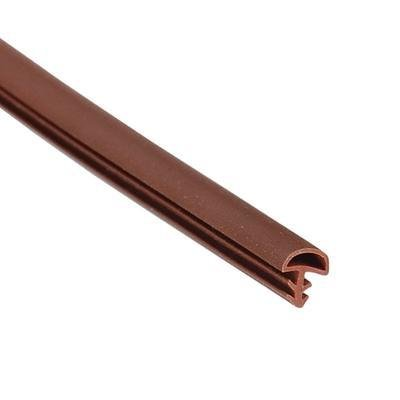 Sealing StripThe Durable Security Door Sealing Strip is an essential accessory for enhancing the insulation, security, and comfort of any entry point. This high-performance strip i...View Product →
How to Fit a Door Seal Strip
Fitting a self-adhesive strip takes about ten minutes once you have the measurements right. The most common failure is not the strip itself but poor surface preparation.
- Clean the frame edge and the door edge with a degreaser. Remove old adhesive residue and let the surface dry for at least 30 minutes.
- Measure the full length from the top of the jamb to the bottom of the strike side. Add 2mm as a safety margin, because cutting off a small piece is easier than adding one.
- Peel away a 10cm section of the backing and press the strip in place, pulling the backing gradually as you move along the frame.
- Cut the strip with a sharp knife at the marked point, leaving the end fully pressed and flush with the frame.
- Close the door and check for an even contact line. If the strip is too thick, the door bounces back; if too thin, you can feel a draft at the edge.
When a Door Seal Strip Needs Replacing
Not every seal failure is visible. If you notice any of these symptoms, replace the strip rather than adding a second layer over it. A worn strip may look fine from a distance but no longer compress evenly.
- Hairline cracks on the surface caused by UV exposure or repeated flexing.
- A flattened contact area that no longer returns to its original shape when you press it.
- Loss of adhesion at any point, usually visible as a small lifted corner.
- Dust or water lines on the door that indicate air is still bypassing the seal.
Seal Strips and the Performance of a Finished Door
The relationship between the door panel and the seal strip is the key to a door that feels solid when it closes. A high-quality WPC door panel with a poorly chosen gasket will still bang, leak sound and let in dust. In our factory, we test the seal fit as part of the door assembly process, so the door arrives with a predictable closing action.
If you are planning a renovation or a door replacement, start by measuring the gap and matching the material to the room. For a deeper look at how seal strips work and how to handle common fitting issues, you can read our door seal strip guide. We also publish details about the production lines and quality checks behind the components we supply.
Key Takeaways
- Measure the gap before buying; most interior gaps fall between 1-5mm.
- Match the strip material to the environment: EPDM for exterior, silicone for wet rooms, PVC or TPE for standard interior doors.
- Clean and degrease the surface before sticking a self-adhesive strip.
- Replace the strip when you see cracks, flattening or loss of adhesion.
- For volume orders, buy the sealing strip from the same supplier as the door to avoid tolerance problems.


