


 English
 中文简体
中文简体
 عربى
عربى

Content
- 1 What a Door Seal Strip Actually Does — and Why It Matters More Than You Think
- 2 The Main Types of Door Seal Strips and Where Each One Belongs
- 3 Choosing the Right Material: EPDM, Silicone, Vinyl, or Foam
- 4 How to Tell When Your Door Seal Strip Needs Replacing
- 5 Step-by-Step: How to Replace a Door Seal Strip Yourself
- 6 Special Applications: Garage Doors, Commercial Doors, and Sliding Doors
- 7 Common Mistakes That Make Door Seal Strips Fail Early
What a Door Seal Strip Actually Does — and Why It Matters More Than You Think
A door seal strip is the flexible material installed around the perimeter of a door frame — and along the door's bottom edge — that closes the gap between the door and the jamb when the door shuts. That gap, often just a few millimeters wide, is one of the most significant sources of heat loss, cold drafts, noise infiltration, moisture entry, and pest access in any building. According to the U.S. Department of Energy, sealing air leaks through weatherstripping can save up to 20% on annual energy bills — one of the highest returns of any home improvement project at this price point.
Door seal strips go by several names depending on context: weatherstripping, door weatherseal, door gasket, draft excluder, and door rubber seal are all terms for the same category of product. What distinguishes them is their material, profile shape, and the specific location on the door they are designed to seal. The right strip for the top of a door jamb is different from the right strip for the door's bottom edge, which is different again from the right strip for a commercial steel-frame door in a high-traffic corridor. Understanding these distinctions is what separates a seal that lasts a decade from one that fails after a single winter.
The Main Types of Door Seal Strips and Where Each One Belongs
Door seal strips are not a one-size-fits-all product. Four primary families cover the vast majority of residential and commercial applications, and choosing the wrong type for a location leads to premature failure, poor sealing, or a door that sticks shut or won't latch properly.
Compression and Bulb Seals
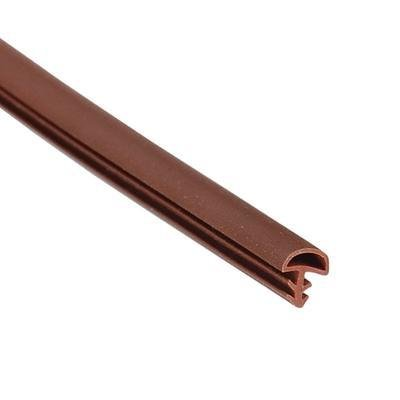
Compression seals use a hollow tube or bulb profile — typically made from EPDM rubber, neoprene, or silicone — that deforms when the door closes, filling the gap between the door face and the stop molding on the jamb. They are the most effective seal type for the top and sides of a door frame because the bulb creates consistent contact pressure along the entire length of the jamb, even when the door edge is slightly uneven or warped. Silicone bulb seals are particularly durable: they do not develop compression memory (the tendency to stay flattened rather than springing back), which means they maintain a tight seal even after thousands of door cycles. EPDM versions are excellent for exterior doors in cold or coastal climates due to their resistance to UV degradation, ozone, and temperature extremes down to well below freezing. A compression seal on the hinge side of a door should be slightly thinner than on the strike side and top, since hinge side gaps are typically narrower — over-compressing the weatherstrip on the hinge side accelerates wear and makes the door harder to operate.
V-Strip Tension Seals
V-strip seals, also called tension seals, are thin strips of plastic or metal (bronze, stainless steel, or aluminum) folded into a V-shape. When installed in the channel between the door edge and the jamb stop, the open V presses against the moving door surface and maintains contact through spring tension rather than compression. V-strips are exceptionally durable — metal versions can last decades without replacement — and they sit nearly flush with the frame surface, making them nearly invisible when installed correctly. They are ideal for the sides and top of entry doors, sliding window sashes, and double-hung windows where a low-profile, long-lasting seal is needed. The tradeoff is that V-strips are less forgiving of irregular gaps: if the gap varies significantly along the door height, a bulb or foam seal will conform better than a rigid V-strip.
Foam Tape and Adhesive-Backed Strips
Foam door seal tape is the most common type found at hardware stores and the easiest to install — peel the backing and press it into the stop molding groove or against the door frame. It comes in open-cell and closed-cell formulations. Open-cell foam is softer and compresses more easily, making it suitable for small, irregular gaps in low-traffic areas like attic hatches or interior doors where moisture resistance is not a concern. Closed-cell foam, including EPDM rubber foam and neoprene foam tapes, is denser, more water-resistant, and significantly more durable under repeated compression — it is the appropriate choice for exterior doors and anywhere moisture or temperature extremes are present. Foam tape is best described as a cost-effective, beginner-friendly solution that excels in moderate-use applications but requires more frequent replacement than rubber bulb or V-strip seals on high-traffic exterior doors. For a primary entry door opened and closed dozens of times daily, plan to inspect foam seals annually and replace every two to five years.
Door Sweeps and Bottom Seal Strips
The gap between a door's bottom edge and the threshold is one of the largest and most problematic air leakage points in any building. Door sweeps address this with a metal or plastic mounting strip that screws to the interior face of the door, holding a flexible seal — vinyl, rubber, nylon brush, or sponge — that drags lightly across the threshold as the door opens and closes. Automatic door bottoms (also called drop seals) are a premium version: they retract the seal upward when the door opens to eliminate floor drag, then drop it flush against the threshold when the door closes. These are common on commercial doors and in high-end residential applications. Under-door seals that slide onto the bottom edge of the door are another option, available in versions that grip both the door face and the door's bottom edge simultaneously. When selecting a door sweep, check whether your floor surface is hard (tile, hardwood, concrete) or soft (carpet): sweeps with sponge or vinyl seals work well on hard floors but will catch on carpet and wear rapidly.
| Seal Type | Best Location | Common Materials | DIY Difficulty | Typical Lifespan |
|---|---|---|---|---|
| Compression / Bulb Seal | Door jamb sides and top | EPDM, silicone, neoprene | Easy–Moderate | 5–15 years |
| V-Strip Tension Seal | Door and window sides | Bronze, aluminum, vinyl | Moderate | 10–30 years (metal) |
| Foam Tape (closed-cell) | Frame stop molding | EPDM foam, neoprene, PVC | Very Easy | 2–5 years |
| Door Sweep | Door bottom edge | Vinyl, rubber, brush, sponge | Easy | 3–7 years |
| Automatic Door Bottom | Door bottom (commercial/premium) | Aluminum with rubber/vinyl | Moderate–Hard | 10–20 years |
Choosing the Right Material: EPDM, Silicone, Vinyl, or Foam
The material a door seal strip is made from determines how long it lasts, how well it performs in your climate, and how much ongoing maintenance it requires. Material choice is the most consequential decision when buying a door seal — more so than brand or price.
EPDM Rubber
EPDM (Ethylene Propylene Diene Monomer) rubber is the industry standard for exterior door seals and weather gaskets. It resists UV radiation, ozone, extreme cold (remaining flexible to below −40°F/−40°C), heat, and common cleaning chemicals. EPDM maintains its compression recovery through thousands of door cycles, which is why it is the material used in commercial door gasketing, automotive door seals, and high-performance residential weatherstripping. If you install an EPDM bulb seal or compression gasket on an exterior door and maintain it properly, it can realistically last 10–15 years before needing replacement. EPDM is available as closed-cell foam tape, solid bulb profiles, and tubular compression seals. For most homeowners replacing exterior door weatherstripping, closed-cell EPDM foam tape or an EPDM bulb gasket is the best value.
Silicone
Silicone door seal strips outperform EPDM in one critical dimension: they have virtually no compression memory. A silicone gasket that has been compressed by thousands of door closings will spring back to its original shape reliably, maintaining a consistently tight seal over the long term. Silicone also handles a wider temperature range than most rubber compounds — it remains flexible from −65°F to 400°F (−54°C to 204°C), making it the right choice for doors exposed to extreme temperature swings or in applications near heat sources. The primary limitation of silicone is cost: silicone door seals are typically 30–50% more expensive than EPDM equivalents. For a primary exterior entry door in a climate with significant seasonal temperature variation, the longevity premium is often worth it.
Vinyl
Vinyl (PVC) door seal strips are more affordable than rubber or silicone and offer good moisture resistance. They hold up well on doors in moderate climates and can be painted to match the door frame — a useful feature in visible interior applications. The limitation of vinyl is its performance at temperature extremes: in sustained cold below 0°F (−18°C), vinyl becomes brittle and cracks; in direct summer sun in hot climates, it can distort. For mild to moderate climates, vinyl is a practical and cost-effective choice. For doors on the north face of a building in a cold-climate region or doors exposed to prolonged direct sun in desert climates, EPDM or silicone outperforms vinyl significantly.
Felt
Felt weatherstripping is the oldest and least expensive door seal material. Plain felt rolls seal door and window perimeters adequately in low-traffic, indoor applications where moisture, temperature extremes, and heavy wear are not factors — interior closet doors and cabinet doors being the most appropriate uses. Felt compresses rapidly under repeated use, becomes moisture-saturated easily, and typically lasts only one to two years on an exterior door used daily. Reinforced felt with a metal backing strip performs better but still falls significantly short of rubber or silicone durability. The DOE explicitly notes that felt and open-cell foam tend to be inefficient at blocking airflow despite their low cost — use them only in protected, low-traffic locations.
How to Tell When Your Door Seal Strip Needs Replacing
Door seal strips degrade gradually, which means the energy and comfort losses they cause build up slowly — often going unnoticed until heating or cooling bills are noticeably higher. Performing a quick inspection once or twice a year catches deterioration early, before a failing seal becomes a significant source of energy waste or moisture damage.
- The dollar bill test: Close the door on a folded piece of paper or a dollar bill. If you can pull it out without resistance, the seal is not compressing against the door surface with sufficient pressure — it is no longer sealing the gap effectively.
- Visible light around the door: Stand inside the room on a bright day with the room lights off. Any visible light around the door frame indicates a gap where air — and potentially moisture and pests — can enter. Pay particular attention to the bottom corners, which are the most common failure point.
- Cracked, flattened, or brittle material: Inspect the seal strip visually. Rubber or foam that has developed a permanent flat set (compressed and not springing back), shows surface cracking, or has become stiff and brittle is no longer performing its function and should be replaced.
- Drafts near the door: Hold your hand near the door perimeter on a windy day or when outdoor temperatures differ significantly from indoor. Any detectable airflow indicates a seal failure. Running an incense stick slowly around the door frame reveals even small air movements — watch for the smoke bending inward or outward.
- Unexplained energy bill increases: If heating or cooling costs have risen without a clear explanation, deteriorated door and window seals are among the first places to investigate. A single poorly sealed exterior door can account for a meaningful portion of annual conditioning losses in an otherwise well-insulated home.
- Moisture, insects, or dust at the threshold: Water staining near the door sill, increased insect entry, or a persistent accumulation of dust or debris along the bottom of the door are all signs that the door sweep or bottom seal has failed and is no longer providing an effective barrier.
As a general rule, inspect door seal strips annually — a good habit to build into a seasonal home maintenance routine. Replace them every five to ten years for quality rubber seals, and every two to three years for foam tape on heavily used exterior doors. Silicone seals installed correctly on quality frames can exceed ten years before replacement is needed.
Step-by-Step: How to Replace a Door Seal Strip Yourself
Replacing a door seal strip is one of the most cost-effective DIY home maintenance tasks available. Most standard exterior door perimeters can be completed in under an hour with basic tools, and the material cost for a complete door seal kit typically ranges from $15 to $60 depending on seal type and door size. Professional installation averages $130–$436 per door, so DIY saves significantly — while the actual installation is straightforward enough for most homeowners.
Tools and Materials You'll Need
- Tape measure and pencil for accurate measurements before cutting
- Utility knife or sharp scissors for trimming foam, rubber, or vinyl to length
- Flat-head screwdriver or putty knife for removing old adhesive-backed or stapled weatherstripping without damaging the frame finish
- Adhesive remover or rubbing alcohol for cleaning residue from the surface before new installation
- Clean cloth and mild soapy water for surface preparation
- New door seal strip appropriate for your door type, climate, and location (see material and type guidance above)
- Screwdriver or hammer and finishing nails if installing a screw-on or nail-on strip rather than adhesive-backed
The Installation Process
Before buying replacement weatherstripping, rule out other causes for drafts. Tighten all hinge screws and lift the door by the handle — if the door moves upward noticeably, loose hinges are causing misalignment that no seal can fully compensate for. Address hinge issues first. Once the door is properly aligned, measure the two sides and top of the door frame, and measure the door's width for the bottom sweep. Add 5–10% to your measurements to account for waste at cuts. Cut the seal strips to length — for kerf-in (slot-mount) profiles used in many wood frames, score the rubber gently with a knife rather than cutting straight through, which reduces tearing.
Remove the existing seal completely. Scoring along the edge with a utility knife before prying breaks the paint seal and prevents chipping the frame finish when you pull the strip away. Remove all adhesive residue with alcohol or an adhesive remover — leftover adhesive prevents the new strip from bonding properly to the surface, the single most common cause of premature seal failure after installation. Clean the entire jamb surface with soapy water and allow it to dry completely before applying new weatherstripping. The U.S. Department of Energy advises applying weatherstripping only in temperatures above 20°F (−7°C) for best adhesion.
Install one continuous strip along each side jamb; avoid piecing together short sections, which creates seams where air can bypass the seal. The strip should compress slightly — visibly deforming but not squashing flat — when the door closes against it. If the door requires noticeably more force to close after installation, the weatherstrip is too thick for the gap and will accelerate wear on both the strip and the door hardware. After installation, perform the dollar bill test and the light check around the entire perimeter to confirm the seal is complete. Pay extra attention to the bottom corners, where the side strips meet the door sweep, as corner gaps are the most common post-installation air leak.
Special Applications: Garage Doors, Commercial Doors, and Sliding Doors
The standard compression-and-sweep combination covers most residential entry doors, but several common door types have distinct sealing requirements that call for different products or approaches.
Garage Door Seal Strips
Garage doors require sealing at four points: the bottom edge (where the door meets the floor), the two vertical sides, and the top header. Garage door bottom seals are typically T-shaped or U-shaped rubber strips that insert into a retainer track along the door's bottom panel. They must contend with an uneven concrete floor surface, so a bulb-type or ribbed rubber profile that conforms to floor irregularities performs better than a flat vinyl blade. Side and top garage door seals use a compression-mount rubber strip that installs to the door stop or frame. For climates with significant snow or flooding risk, a threshold seal installed at the floor line in front of the door provides an additional barrier against water entry under the bottom seal.
Commercial and Steel-Frame Doors
Commercial door frames are typically hollow metal (HM) or aluminum, and standard residential weatherstripping is not compatible with their profiles. Commercial door seals use kerf-in gaskets — solid rubber or silicone profiles with a barbed tongue that inserts directly into a milled slot in the steel frame. For fire-rated or smoke-rated door assemblies, the seals must carry specific UL listings (smoke seals, intumescent seals) — standard weatherstripping cannot be substituted for rated assemblies without voiding the door's fire rating. High-traffic commercial entries use heavy-duty neoprene or EPDM perimeter gaskets and automatic door bottoms rated for millions of cycles, not the thousands that residential hardware is designed for.
Sliding Glass Doors and French Doors
Sliding doors require a different seal approach than hinged doors because the panel moves horizontally through a track rather than swinging on a pivot. Pile or fin seals — dense synthetic fiber brushes attached to an aluminum or vinyl carrier strip — install in the track channels and brush against the sliding panel's edges, providing a seal that accommodates the sliding motion without restricting it. Standard compression seals cannot be used here because they would bind the door. For French door pairs, an astragal is the seal strip installed on the meeting edge of the active door; it compresses against the passive door to close the gap between the two panels when both are shut. Astragals with integrated seals come in surface-mount and overlapping designs; the overlapping type provides a tighter seal for exterior French doors in climates with driving rain or strong winds.
Common Mistakes That Make Door Seal Strips Fail Early
Even a good-quality door seal strip installed with the wrong technique will fail prematurely. These are the most common errors — all easily avoidable with a bit of preparation.
- Installing on a dirty or oily surface: Adhesive-backed seals require a completely clean, dry, grease-free surface. Skin oils transferred during handling, dust on the frame, or residual cleaner left on the surface all prevent the adhesive from bonding properly. Wipe the frame with rubbing alcohol and let it dry completely before applying any peel-and-stick weatherstrip.
- Installing in cold temperatures: Most pressure-sensitive adhesives require temperatures above 50°F (10°C) to bond effectively. Installing weatherstrip tape in a cold garage or on a freezing exterior door results in a seal that adheres weakly and peels away within weeks. Warm the surface with a heat gun on low if necessary before applying adhesive-backed strips in cold conditions.
- Over-compressing the seal: A seal strip that is too thick for the gap will over-compress, which causes the door to bind, strains the latch and hinges, and dramatically accelerates wear on the seal material. Match the seal thickness to the actual gap width — the strip should compress noticeably when the door closes but should not require additional force to latch.
- Leaving gaps at corners: The corners where side strips meet the head jamb strip are the most common location for post-installation air leaks. Cut the ends of adjoining strips at complementary angles (a butt joint works well and often seals better than a mitered cut), and add corner pads at the bottom corners where the side strips meet the door sweep zone — this is where most doors have their hardest-to-seal gaps.
- Stretching the seal during installation: Silicone and rubber seals should be cut to the measured length before installation, not stretched to fit. A stretched seal will contract back toward its natural length after installation, pulling away from corners and creating gaps. Measure twice, cut once, and handle the strip without tension.
- Using the same seal thickness on all four sides: The gap between a door and its frame is rarely identical on all sides. The hinge side is typically tighter than the strike side; the top may be wider than both. Use a thinner compression seal on the hinge side to prevent the door from riding on the hinge-side strip and causing it to wear faster than the rest of the seal.


